If you ever think to make a donation form in WordPress then there are some simple steps to create your first donation form on your WordPress website.
In this tutorial, We will show you how to make an online donation form for non-profits, there are many benefits to have this without any lengthy process or any other unnecessary steps.
This form helps to increase tour donation value as your supporters are like to donate if the process is simple and quick. Thus also make normal or lazy users do so. The fields are easily customizable so you get more information about your donor and to stay connected.
Table of Contents
Why use WPForms?
WPForms is the most advanced, easy, and user-friendly plugin for creating forms for WordPress websites. Millions of people use it to expand their business all over the globe. The interface is very easy, you can use the drag and drop system to organize the fields manually, you can make a form in less than 3 minutes. No matter you have any coding skills or not.
You can make a Contact form, donation form, payment form, registration form, survey form, and many more forms very easily using this plugin within a few minutes.
You can read my complete WPForms review from here.
Apart from this, you can also add some addons like PayPal standards, stripe, active campaign, etc to add more functionality and make user friendly.
Let’s make this easy for you by dividing this into a 7 step process.
Step 1: Installing WPForms And Creating Your First Form For Non-Profits
Firstly you need to install and activate the WPForms plugin. You need the WPForms Pro license in order to start accepting donations. Get it from the below link.
After that, go to WPForms-> Add New to create a new donation form.
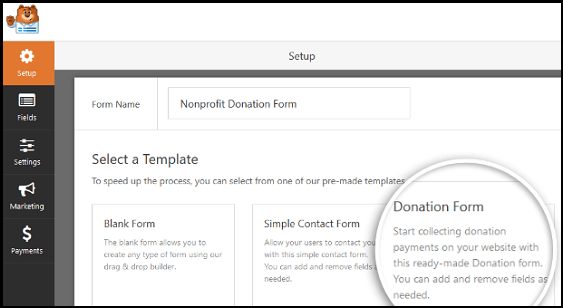
On the interface, you will see the donation form, click on it. Now you get the form to fill the data.
Step 2: Customizing The Form Fields
There is a default field of name, email, donation amount, and message.
Generally, this is enough for the process but if you still want to add another field then this plugin allows you to drag and drop for easy arranging of fields in the form. You can also choose multiple options like drop-down and checkboxes.
If you are done you dropping the fields then click on the save changes.
Change the label as the amount donated, you can also change each item in the multiple-choice option. Do not forget to check on the required section to make sure that the user fills any value in fields before submitting it.
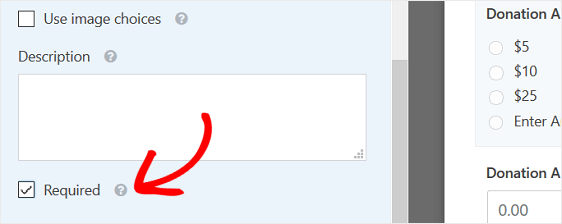
After that customize your form that shows Enter amount is selected as default in the donation section. Uncheck the required checkbox again so that the user can select the predefined amount if they want to select that.
If all set, select for the conditional logic to some other manual condition you want. This allows the user to enter the amount, not from the pre-defined input means the user can enter their own value.
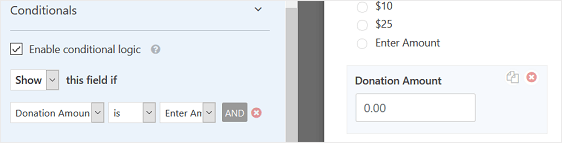
Once you set your condition Click on save.
Step 3: Configure Form Settings
In this setting, there are some fields you need to fill-
- Form Name — Enter the name which you want to show.
- Form Description — Enter the description of your donation form.
- Submit Button Text — Edit the button like size, color, etc.
- Spam Prevention — Enabling this will allow increasing the security systems. The honeypot features are enabled automatically of forms if this box is checked.
- AJAX Forms — This allows to reload the whole page at once.
- GDPR Enhancements — You can enable or disable storing the information of users in the form.
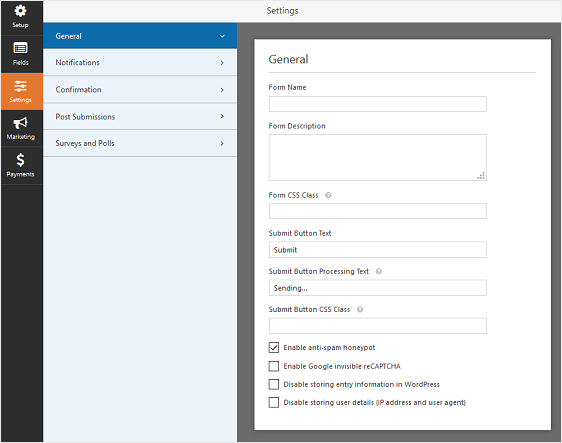
When all complete, click on save.
Step 4: Enable Form’s Notification
If you do not disable this you will automatically get the notification of any donation by default. Using smart tags also allows you to send the notification to the donor that you receiver the money form their side. You can say, feedback to the visitors.
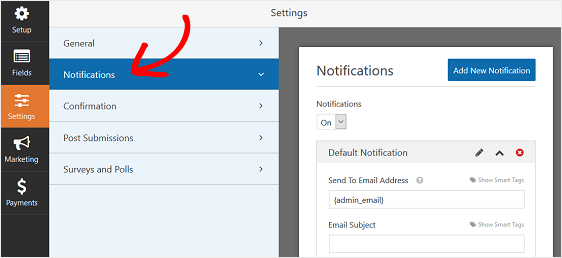
In the default notification, the section you can also change the name and email where the notification has to send.
Step 5: Setting up Form Confirmation
This ensures the donor to get the notification about the money is received by the site website and redirect to the next step.
In this box, there are 3 ways to choose form.
1- Confirmation Type- This is the default setting in forms. When a visitor makes a donation a popup message appears on the screen that the donation is successful and a=ensure the user about their money.
2- Confirmation Message- This allow us to configure the message on the successful donation. This message should be like that to boost customer loyalty.
3- Redirection: If you want to send your visitors to another URL.
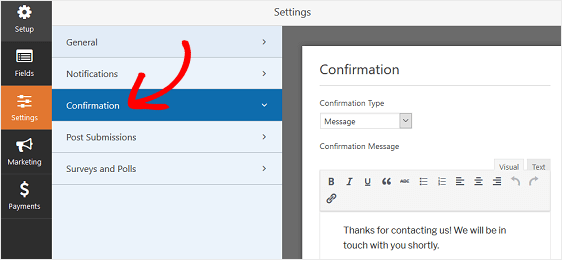
For example, here we select the message and then in the message “Thank you for your valuable donation, this will motivate users to keep going ahead” or anything you like to write. Replace the default text with your message.
After filling each field you can click on save buttons.
Step 6: Configuring Payment Settings
This is the most important part of the tutorial. WPForms offers PayPal, Stripe, and a few others to accept the payments.
We will use Paypal to receive donations, so we will have to use the PayPal addon. For this, you have to install and activate the PayPal addons.
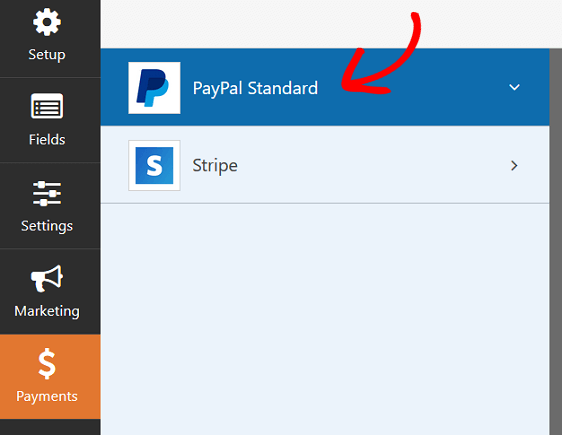
After that click on the payment slab for further process.
Now follow these steps-
- Check on the PayPal Standards payments.
- Paypal Email Address- For PayPal account, where the payment will send.
- Mode – Production or Test/Sandbox
- Payment Type: You have to choose the “Donation” option.
- Cancel Url– If the user cancels the transaction then where they will be redirected to.
- Shipping- If the user confirms the payment then where the user will be redirected to.
After that, there is a 2 checkbox button at the end of the setting. In the first box “Don’t ask the buyer to include notes”. If you check this box to turn this feature off.
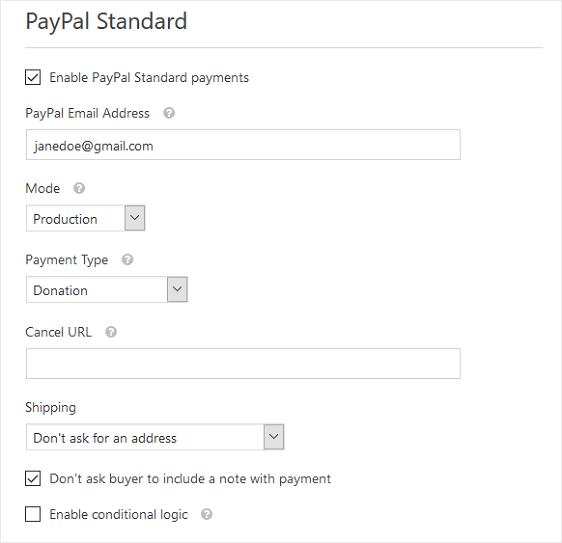
In the second option if it checks then it enables conditional logic. Useful when you allow the user to choose either paying with strip or Paypal. But we suggest to uncheck it.
After all that setting you click on Save to store the payment information.
Step 7: Add the form in your website
After you successfully completed the setting now need to add on your website. You can place at multiple places like pages, posts, etc. Let’s have an option to do so.
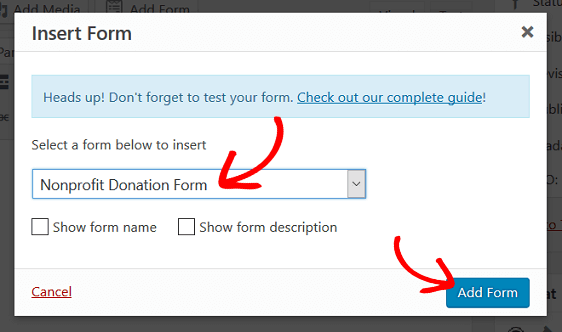
Create a post and click on Add Form. Select your form below to insert as “Nonprofit Donation Form” and click on Add Form.
Now its all set and your donation form will be visible on your post.
You can save the data of the donors for further information and announcing any event if organized.
Final Verdict
Now you are able to make an online donation form in your WordPress site using WPForms. This is easy and drag and drop elements, PayPal standards, etc that make it understandable and useable by the casual user as well as developers.
This is the best method for any type of donation of transactions through PayPal standards. Read the steps carefully to avoid any further problem and we suggest you try for a test mode once before make it visible in the live posts.